Single Sign-on (SSO)
Single Sign-on (SSO) allows your team members to authenticate to DVC Studio using your organization's identity Provider (IdP) such as Okta, LDAP, Microsoft AD, etc.
We support integration with Okta, and instructions are provided below; but other IdPs should also work in a similar manner. If you need any support setting up your IdP integration, let us know.
SSO for teams can be configured by team admins, and requires
configuration on both DVC Studio and the IdP. The exact steps for this depend on
the IdP.
Once the SSO configuration is complete users can login to DVC Studio by opening
their team's login page http://studio.datachain.ai/api/teams/<TEAM_NAME>/sso
in their browser. They can also login directly from their Okta end-user
dashboards by clicking on the DVC Studio integration icon.
If a user does not have a pre-assigned role when they sign in to a team, they
will be auto-assigned the Viewer role.
Okta integration
-
Create Enterprise account: SSO is available for DVC Studio teams with enterprise account subscriptions. If you are on the Free or Basic plan of DVC Studio, contact us to upgrade your account.
-
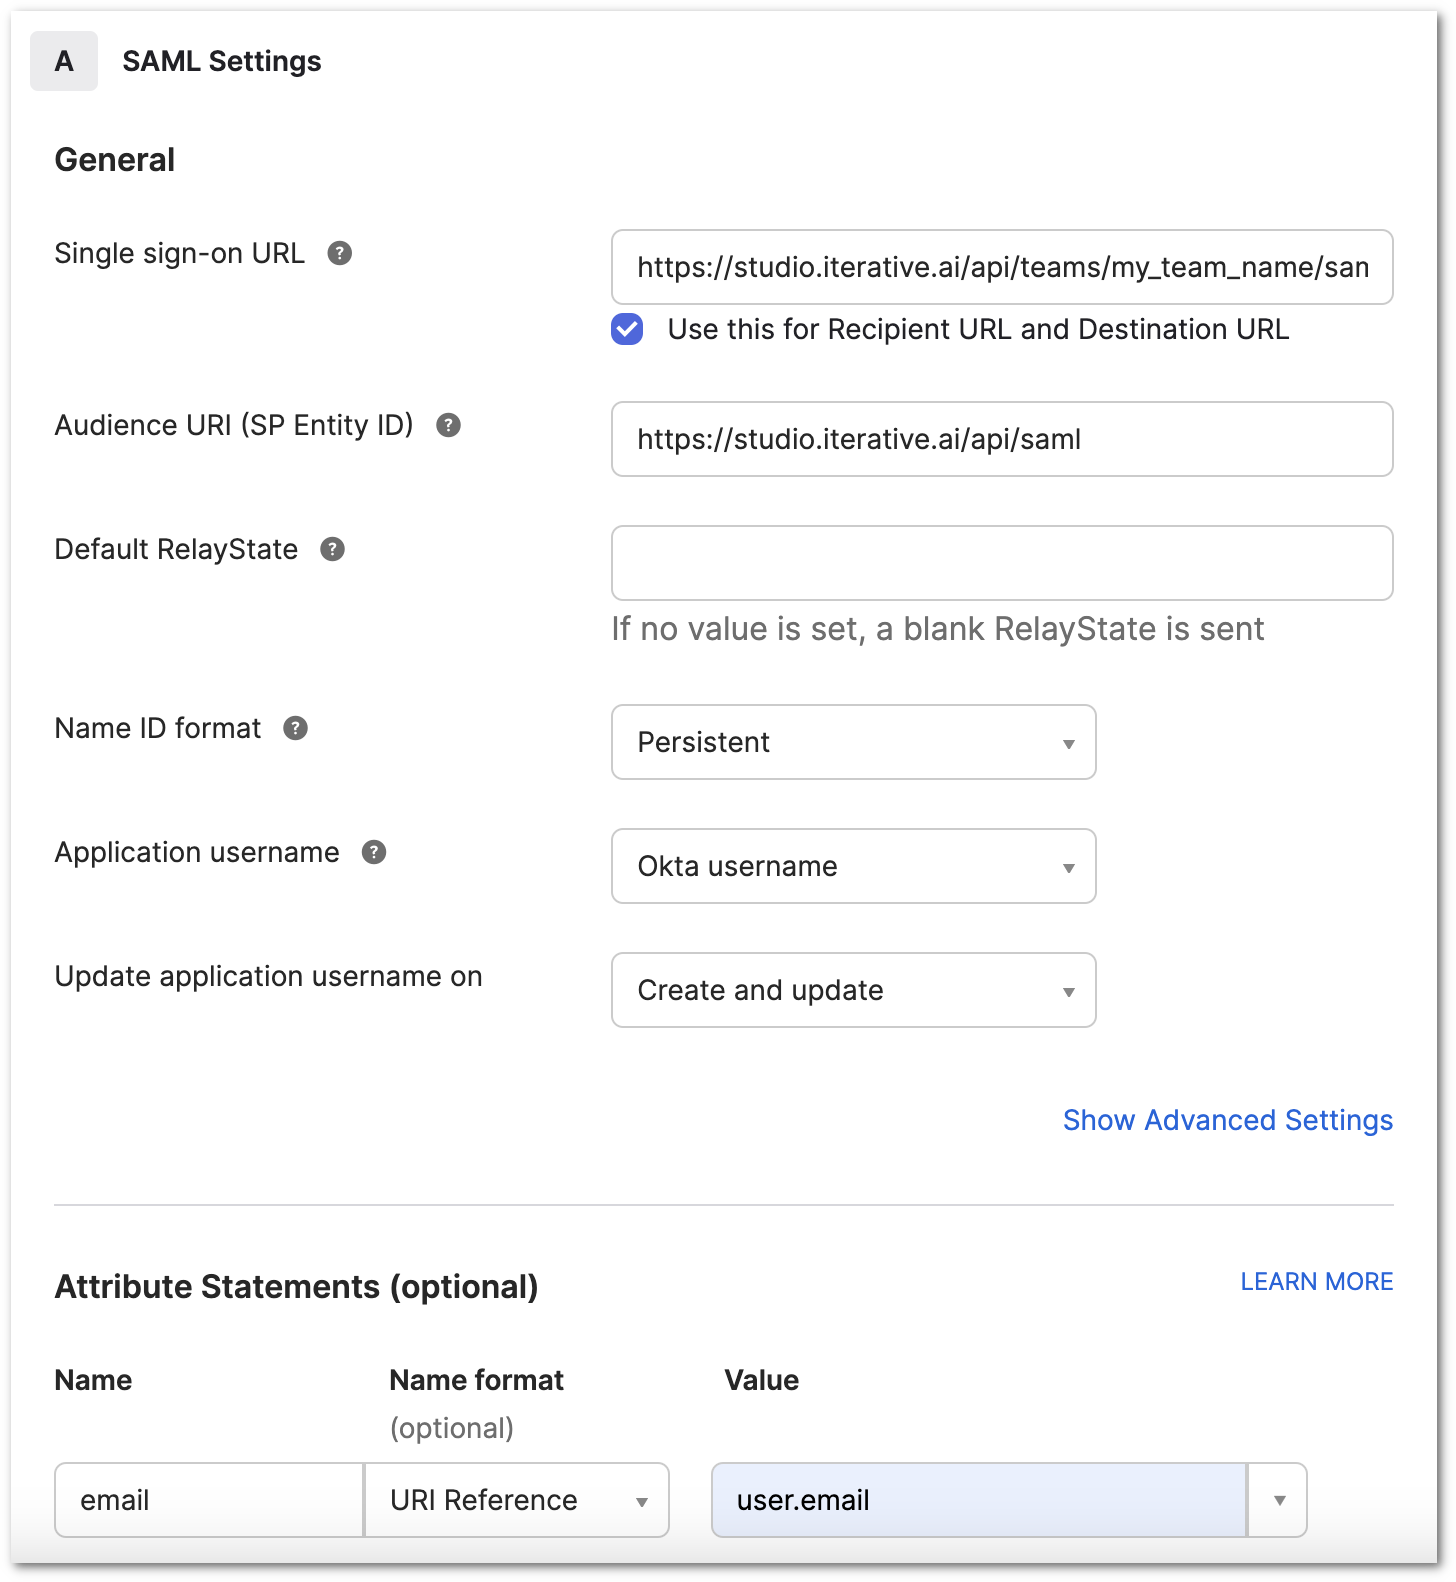
Add integration with DVC Studio in Okta: Follow the instructions from the Okta developer guide. In short, login to Okta with an admin account, and follow these steps:
- In the admin console, go to
Applications->Create App Integrationto create a private SSO integration. - Use
SAML 2.0as theSign in method(and notOIDCor some other option). - Enter any name (eg,
DVC Studio) as theApp name. Single sign-on URL: https://studio.datachain.ai/api/teams/<TEAM_NAME>/saml/consume (Replace <TEAM_NAME> with the name of your team in Studio.Audience URI (SP Entity ID): https://studio.datachain.ai/api/samlName ID Format: PersistentApplication username (NameID): Okta usernameAttribute Statements (optional): 1.Name: email 2.Name format: URI Reference 3.Value: user.email

- Click on
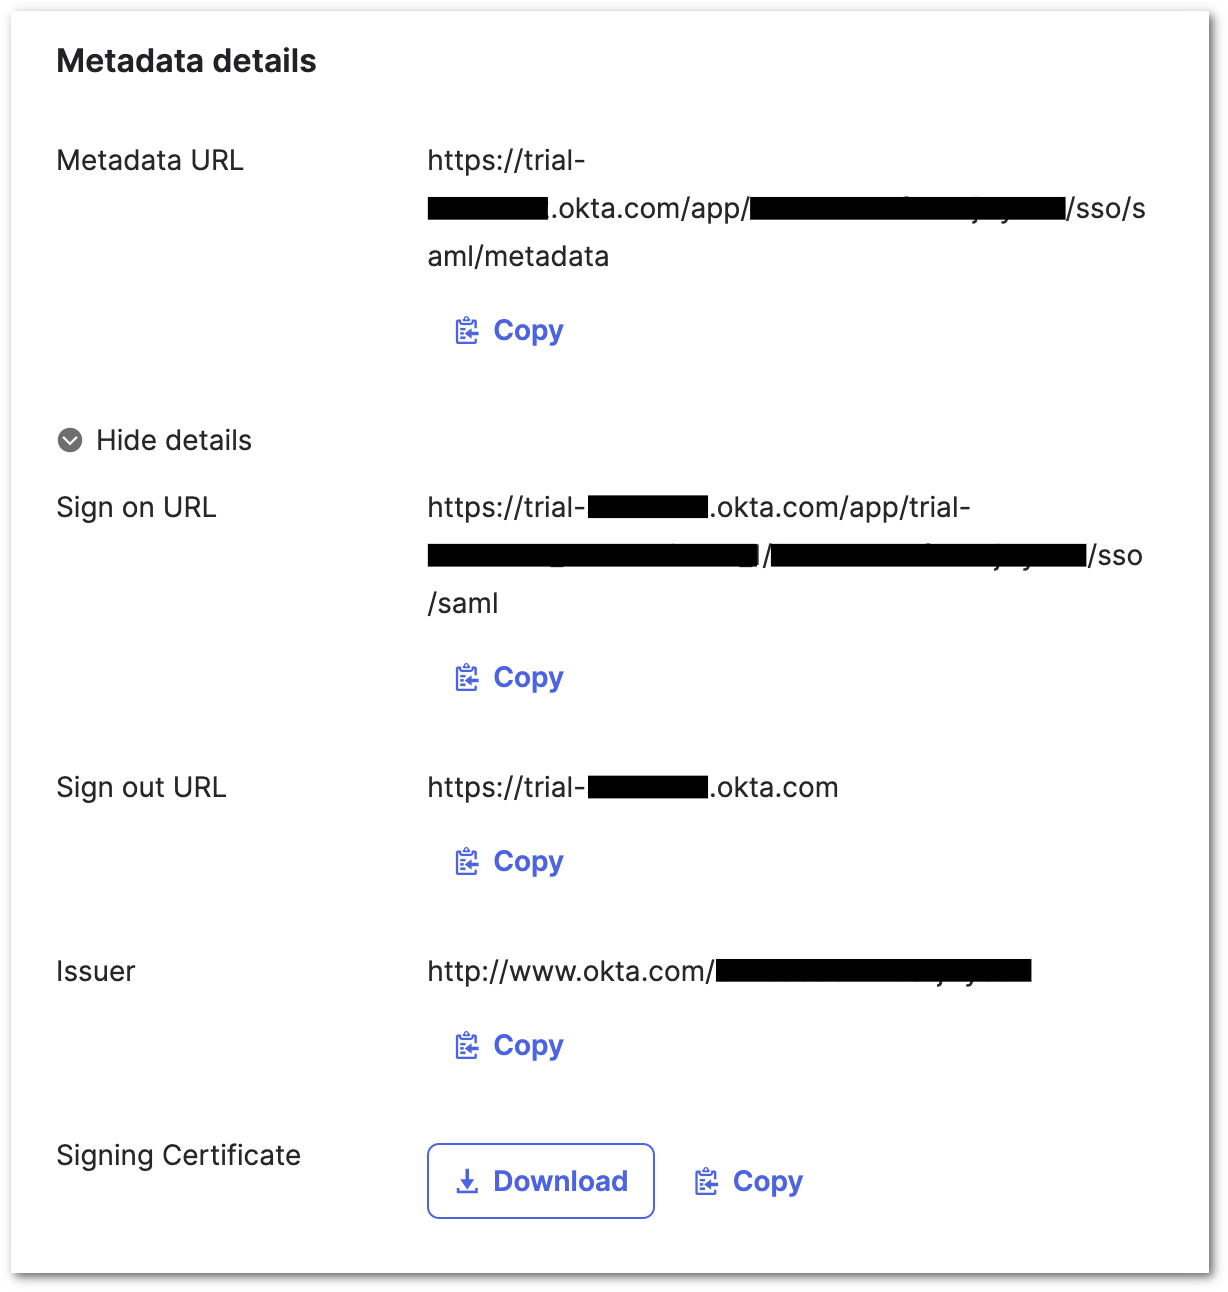
NextandFinish. - Once the integration is created, open the
Sign Ontab and expand theHide Detailssection. From here, copy theSign on URL,IssuerandSigning Certificate.

- In the admin console, go to
-
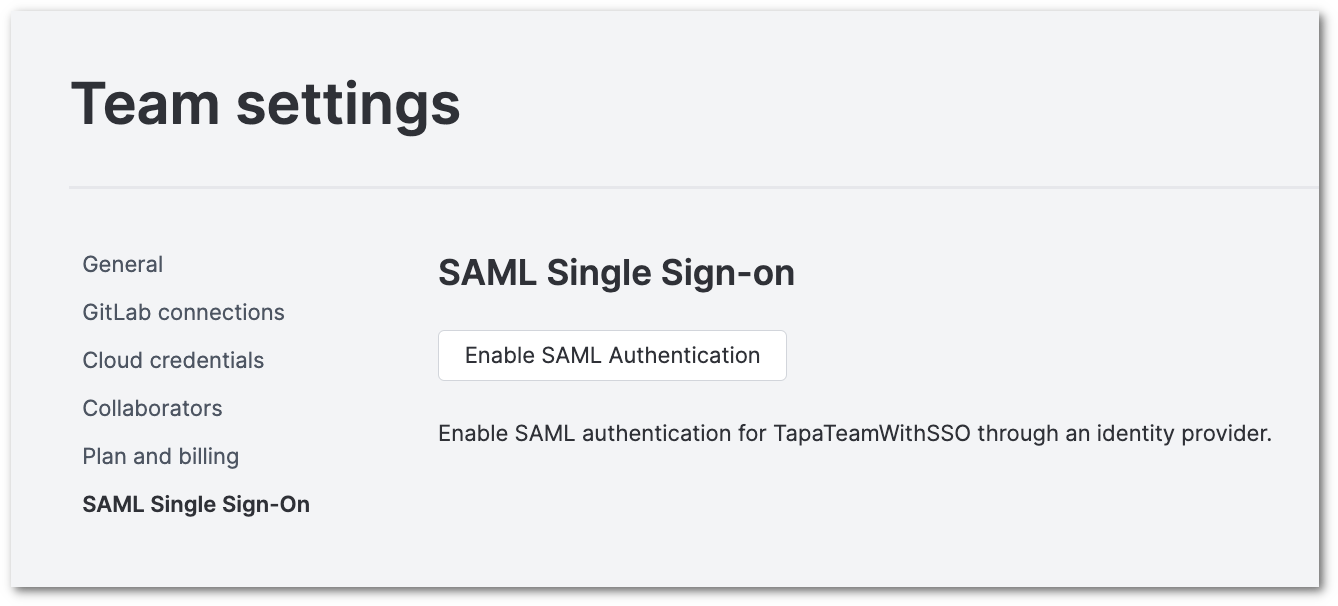
Configure Okta in DVC Studio team settings: Back in Studio, open your enterprise team's
Settingspage. Go to theSAML Single Sign-onsection and enable SAML Authentication.
Then, fill in the required details:
-
Sign-on URL: Paste theSign on URLyou copied from Okta -
Identity Provider Issuer URL: Paste theIssueryou copied from Okta -
Public Certificate: Paste theSigning Certificateyou copied from Okta. Or, you canDownloadtheSigning Certificatefrom Okta, open the downloaded file with a text editor, and copy the value from here.
Then, click on
Save. DVC Studio will generate theSSO login URLand theassertion consumer service URLfor your team and display their values to use just below theSavebutton.
-
-
Assign users: Now, whenever you need to authorize users to access your DVC Studio team, you should assign these users to the application that you have configured. For this, open Okta and follow these steps:
- Open
Applications - Click on
Assign Users to App - Select your app, and select all the users you want to assign.
- Click on
NextandConfirm Assignments.
The Single Sign-on URL for your team is https://studio.datachain.ai/api/teams/<TEAM_NAME>/sso. Users that you assign to your team can login to DVC Studio by opening the Single Sign-on URL and providing their Okta login credentials.
If a user does not have a pre-assigned role when they sign in to a team, they will be auto-assigned the
Viewerrole. If the role needs to be changed, it has to be done in theCollaboratorspage in the DVC Studio team settings. - Open
